
i can't wait to get this flower wall done...i mean, i made one already but did not find the time to take pictures and to write the tutorial...i was actually producing paper flowers.
the flowers were meant to decorate my parents place, while i was celebrating my birthday with good old friend...but this time the paper flowers should decorate my own place and i think the kraft paper flowers will look great on my living room wall, which happens to be painted in a very similiar colour.
as soon as i am done with the flower and as soon as i find a way to stick them onto my wall, i'll let you know.
until then, i'll keep on posting the tutorials of the flowers, i am making.

this is what you need

- kraft paper (dinA 4 size)
- pencil
- eraser
- scissors
- glue stick
- glue
- template
this is what you have to do

- get one sheet of kraft paper ready

- fold into half lengthswise

- fold into half one more time

-draw the petal according to the template

- apply some glue onto the lower left side of the petal

- fold the left side over and press carefully onto the right side of the paper

- the petal should look like a cone

- repeat with as many cones as you need, i used about twenty-five of them

- cut out a medium sized circle

- glue the first cone onto the outer edge of the circle

- continue gluing cones along the egde
- keep on adding cones until the entire circle is covered

- get your glue ready

- apply some glue into the centre of the circle

- place some more cones in the centre of the circle

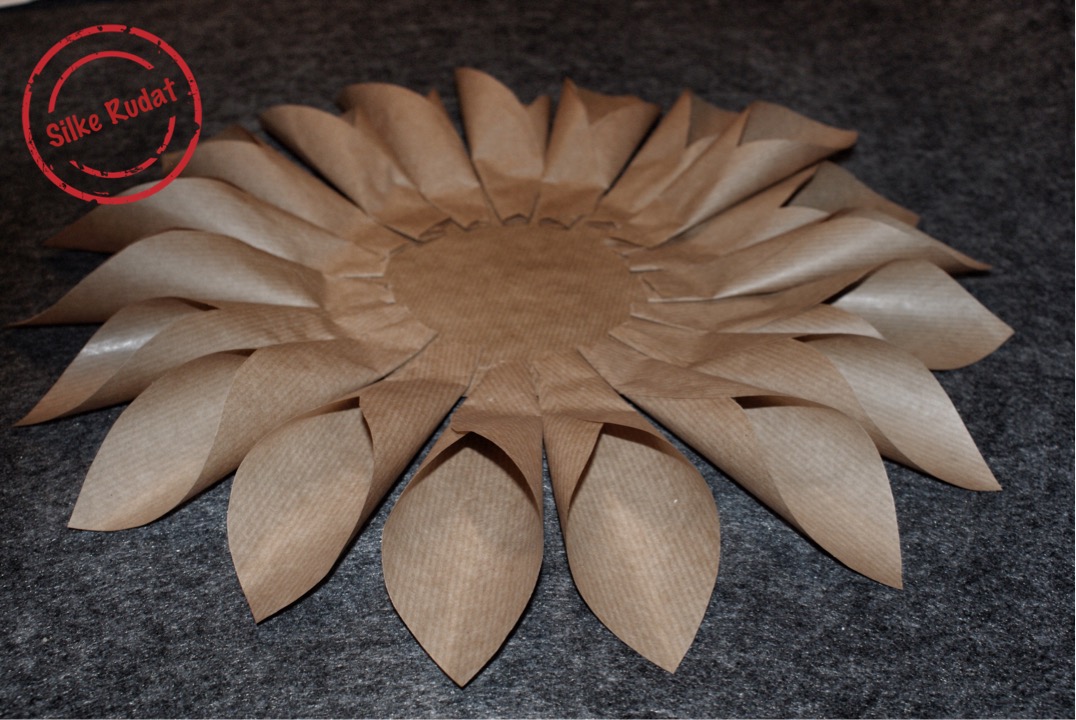
- it could look like this

- apply some more glue

- you might have to shorten the cones for the inner circle
- glue them into the inner circle

- let everything dry

- get a larger strip of kraft paper ready

- fold the paper strip into half

- cut some fringes into the paper strip

- furl the fringed paper strip


- apply some glue onto the outer end of the paper roll

- press the end firmly onto the roll

- pull the fringes apart

- apply glue on top the last layer of the paper cones

- press the fringes paper roll firmly into the centre

- here we go
two more flowers are in progress and the tutorials will follow soon.
thank you very much for stopping by...best reagrds...silke