Showing posts with label ...in love with jewellery. Show all posts

Tuesday, 30 September 2014

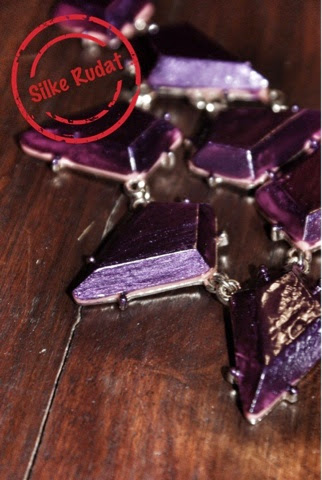
nail polished necklace

it could not be any easier...

a necklace that's really beautiful...but has the wrong colour...and nail polish in the right colour...that's it...just paint the necklace with nail polish...and you do have a new necklace in your favourite colour.

...stylish...easy...cheap...this is exactly what a perfect diy project is to me.

so...watch out for some nice necklaces and nail polishes and get started...

i wish you a lot of fun...best regards...silke


this is what you need


- statement necklace

- nail polish


this is what you have to do


- paint

- paint

- paint


- let it dry

- and enjoy your "new" necklace


...and another in red

Wednesday, 25 June 2014

brass washer necklace

another visit to the hardware store...and this is what i got.
...an inspiration for another necklace.

i was pretty much sure, that i would go for some washers and was very delighted to see that brass washers exist, too...yes...this is what i wanted...and they do have matching chains...yes.

...back home, i spread all my new treasures out and started thinking and thinking and thinking.

and...this is what i got...a layered brass necklace with a washer decorated wooden flower as a base for an attachable brooch.


 this is what you need


- eleven brass washers, plus one extra washer

- six smaller washers

- 5m brass filigrane chain

- wooden base

- plain hairclip

- glue

- metallic paint

- brush

- pliers


this is what you have to do


- paint the wooden base, if required


- start adhering the washers to your base


- glue the hairpin onto the backside of the wooden flower


- get your pliers ready


- twist open the last ring of the chain


- cut the chain in six pieces of various lenghts


- attach the first ring of the first chain to one of the washers


- close the ring again


- repeat with the remaining five chains


- and attach the last rings of the six chains to the opposite side of the washers


- get your brooch ready


- attach your brooch onto the chains


- and here we go, your hardware store necklace is ready to wear


nice, isn't...???

hardware stores are well equipped with stuff, which is worth being repurposed into cool and stylish other things...i can't wait to go back there, to see what i could get next.

i hope you have enjoyed the brass washer tutorial and may get inspired yourself.

...best regards...silke

Monday, 26 May 2014

dramatic statement necklace with handmade ornaments

ohhh...i totally had a crush on this necklace, the second i saw this necklace somewhere on the net...i had to have one of those...and luckily it wasn't just an advert or a picture...no a tutorial...lucky me.


looking at the tutorial, i learnt the inspiration for this beautiful necklace is a desinger necklace from proenza schouler...okay...i can live with that.

this necklace is a gift for my sister-in-law...but of course i had to do one for myself and learnt a few things from the making of it.

first of all...no need to be extra careful, when it comes to drilling the ornaments...do not drill from the backside of the ornaments, as it is difficult to find the exact position...

second...try to drill the hole as close to edges as you can...otherwise you have to live with huge jump rings, which do not look that elegant and are also difficult to get.

third...no need to spray-paint the ornaments from the back...the colour might come off...yes, this happened to me.

fourth...check if  the finished necklace is assembled in the right way, before you take the picture and give the necklace away....yes...i made a mistake with the small upper parts and luckliy i figured it out just before the gift wrapping.

other than that...this necklace is really easy to make, it took a bit of time to make the ornaments, but it was so worth it.

i hope you enjoy the tutorial...best regards...silke


this is what you need


- ornament moulds

- fine ceramic casting powder

- water

- measuring cups

- silicone bowl or any other container, you are willing to through away afterwards

- drill

- fine drill bit

- pliers

- spray-paint

- an inexpensive necklace

- jumps rings

this is what you have to do


- pour one part of water into your mixing bowl


- slowly sprinkle in three parts of the casting powder


- in order to avoid lumps leave to stand for one minute and do not stir

- then stir the mixture for a minute in the same direction


- pour 1/3 of the prepared casting compound into the relief moulds

- distribute the mixture evenly


- fill the form completely 

- the drying process takes about 30 minutes


- to remove the relief figures lay the mould upside down on a flat and firm surface

- carefully lift the moulds on all sides


- they come out really easy


- spread out your ornaments 


- spray-paint the relief ornaments, you might have to repeat this a couple of times


- get the ornaments ready and choose the position of each ornament within your necklace and mark the position for the holes


- carefully drill your holes


- attach all ornaments to each other using your jump rings

- attach your purchased necklace to your ornaments using your pliers

- if you like, you can spray-paint the pendants of the purchased necklace and add to you ornaments, too




Thursday, 1 May 2014

fashionable layered necklace

...unique and stylish...repurposed and upcycled...quick and easy.
this is exactly the way i love crafting.

with only little inexpensive hardware store and craft shop supply, you can easily create your own precious jewellery.

while searching my apartment for a suitable pendant for the necklace...i found this christmas tree decoration, which was actually repurposed already...as decoration for my shower curtain.

...as grey is my absolute favourite colour and the rope and the pendant are just matching so well...i decided to keep the original colour, but you can also spray-paint the necklace in any other fancy colour to suit your wardrobe.


this is what you need


- clothesline

- pliers

- 2 ribbon clamps

- 3 jump rings

- 1 trigger clap

- fancy pendant


this is what you have to do


- cut the clothesline with your pliers


- you need seven strings in seven different lenghts


- place all seven ends into one of the ribbon clamp


- firmly squeeze the ribbon clamps together, using your pliers


- get one of the jump rings and your pendant ready


- attach the jump ring to the pendant


- attach the pendant to the top layer of the clothesline


- pull it into the midlle of the string


- attach the ribbon clamp to the other ends of the strings


- firmly squeeze the ribbon clamps, using your pliers


- get another jump ring and the trigger clap ready


- attach the jump ring to the trigger clap


- attach both to the ribbon clamp


- attach the last jump ring to the ribbon clamp of the other side of the necklace


- close the necklace


- and here we go


i hope you enjoyed the tutorial and maybe also the repurposed clothesline necklace...best regards...silke