Monday 27 April 2015

test tube wooden ball vases

test tubes...aren't they just asking for being repurposed into fancy vases...???

oh yes...they do...and they look really great in combination with wood...i sort of liked the idea of using big wooden balls instead of a wooden board...and i am happy that i did so.

...somehow i thought i could make them stand alone, but after a while i realised that my vases needed a foot...no problem i still had a few plastic champagne flutes left and their feet are just perfect for this purpose.

i was lucky and found huge wooden balls with holes...i guess they are something like giant wooden beads...so the drilling wasn't a big deal, i just had to enlarge the holes.

this project is quick and easy and makes a great centerpiece for your dining table or a beautiful gift for various occasions.

let me show you how to turn test tubes and wooden balls into unique vaes...i hope you do enjoy my tutorial.


this is what you need


- wooden ball

- test tube

- drill and grinding accessory (optional)

- sanding paper

- wood stain paint

- brush

- plastic champagne flute foot

- glue


this is what you have to do


- get your wooden ball and your drill ready


- drill a hole into the ball or enlarge it with your drill


- you can use a grindling tool to enlarge the hole


- keep on drilling or grindling until the test tube fits into the hole


- looks good


- insert the test tube


- remove the tube and sand the wooden ball


- get your paint and brush ready


- paint the ball


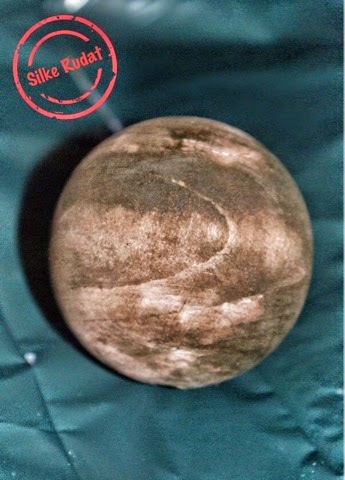
- let the wooden ball dry


- get your champagne flute foot ready


- this is what i am talking about


- here it is


- glue the wooden ball onto the champagne flute foot


- like this


- get your test tube ready


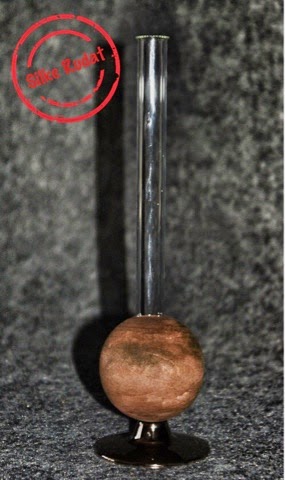
- insert the test tube into the hole of the wooden ball


- and here we go


- pour water into tne vases and place your flowers inside


- i used artificial flowers and of course skipped the step with the water pouring


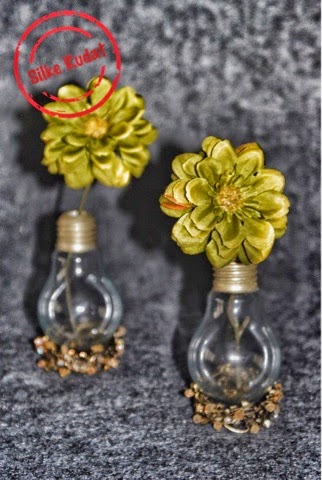
the inspiration for wooden test tube vases comes from here


thank you very much for visiting my blog...best regards...silke

Monday 20 April 2015

elegant light bulb vase

one of those upcycling projects, which came immediately into my mind when i thought of light bulbs...light bulb vases...they are quite cool and when painted in a metalic they are really elegant.

...there are a couple of variations out there in the crafting and upcycling community...mostly the vases were attached to wires so they could be hung...i decided to place them onto napkin holders, because i found those beautiful golden ones in my stock and wanted to paint the cap of the bulbs anyways.

the making of the vases is not that difficult...but to be honest...not as easy as i thought.

the main challenge is to remove the unwanted parts of the bulb...but with a bit patience and the right tools it worked after a while.

you are more than welcome to follow my pictured tutorial, i hope it gives you all the information needed and i hope it is also enjoyable.


this is what you need


- light bulb

- small saw or knife

- pliers

- golden napkin holder

- golden paint

- sponge


this is what you have to do


- remove the contact of the light bulb (the tiny silver coloured part of the outer cap)

- this could be done with a small saw or knife


- like this


- insert your pliers into the bulb


- move your pliers forward and backwards


- the black glass piece will be cracked after a while


-  bit by bit the glass pieces can be removed with the pliers


- apply the same procedure to remove the inner glass and wire pieces


- get your paint and sponge ready


- paint the cap and let the paint dry


- place the bulb onto the napkin holder


- aren't they beautiful...???


- pour some water into the light bulb vases and place small flowers inside...or you can use articial flowers and skip the water pouring part...like i did


- a close-up of the vase


- and a summary


there are so many light bulb vase tutorials out there throughout the web, so i think it is not fair to link to only one of them and decided to skip that part.

thank you very much for visiting me and my tutorial...best regards...silke