Thursday, 31 January 2013

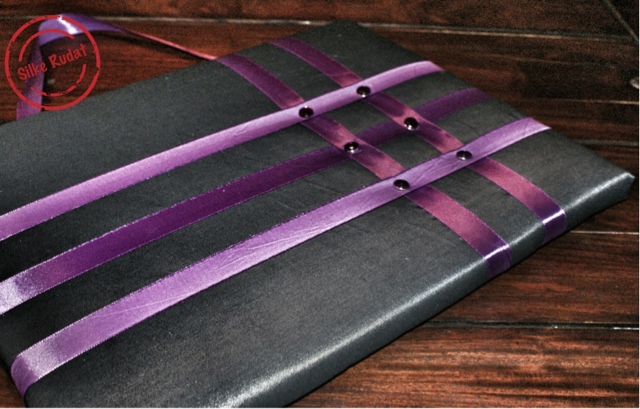
girlie and guy version of a french memoboard

...and here we go with some more memoboards...no fashion designer inspiration...but again very simple to make, inexpensive and with a lot of variation possibilities...and this time i made a guy version, too...


girlie stuff


                             guys stuff


                       more or less neutral stuff


this is what you need


- canvas 30 by 40cm
- fabric, slightly larger than the canvas
- batting, slightly larger than the canvas
- felt, slightly smaller than the canvas
- matching ribbon, about 3 meter
- staple gun and staples
- hot glue gun and hot glue sticks
- optinal brads, buttons or a matching flower


this is what you have to do


- cut your batting big enough to cover your canvas


- secure the batting with the staple gun and stretch it slightly


- it should look like this


- cut your fabric big enough to cover the padded canvas


- secure the fabric with the staple gun, stretch it slightly and pay attention to the pattern of the fabric


- it could look like this


- arrange the ribbon on the board, fold one end to the back and staple it


- cut the ribbon a little bit longer than the distance across the border


- stretch the ribbon to the opposite corner, fold the other end to the back and staple it

- repeat with the other ribbons


- optional you can add some brads to the ribbons or just a matching flower


- cut a piece of ribbon as a suspension device and staple both ends


- cut  a piece of felt slightly smaller than the canvas

- attach the felt with the hot glue gun to cover the back of canvas


- attach memos, photos or anything else and enjoy your french memo board     


...and here you can find my inspiration     


Sunday, 27 January 2013

memoboard a la pucci

...as promised...here comes another memoboard post...and today i decided to stick to the fashion designer inspired once and chose a pucci style.

to be not too boring...those memoboards differ from the chanel style once in many ways...

...both are magnetic and you do not need to staple or hotglue anything...so basically they are even easier to make and you do require less material, too.

as i used tart tins from a 1€uro shop and opted not to attach any hanging device...they are even a lot cheaper to make, too.

i hope you enjoy the tutorial.


this is what you need


- magnetic tart tin
- fancy fabric, slightly bigger than the tart tin
- spray-on adhesive
- scissors


this is what you need to do


- lay your tart tin on top of your fabric


- cut your fabric out


- about 5cm larger than the tin


- turn your fabric upside down


- spray your tart tin with spray-on adhesive


- lay your fabric on the side you sprayed and smooth out any wrinkles


- flip your tin over and start spraying the rim with adhesive


- fold the fabric over pull it as tight as possible and press it onto the metall rim


- it should like this, when you finished


this is what inspired me


Thursday, 24 January 2013

memoboard a la chanel

...memoboards are something most people seem to have and just use a very plain type which just does what it has to do...keep all your reminders in place...so why not having one which looks beautiful...

as with everything else, i am not able to create just one...no...it has to be an entire collection, again.

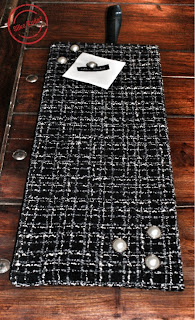
...and today i would like to start with some memoboards a la chanel, using cork pot holders, waterhyazinth placemats and a magnet board.


cork pot holder memobards

this is what you need


- cork pot holder
- chanel style fabric
- ribbon
- felt
- scissors
- staple gun and staples
- hot glue gun and glue sticks
- pearl stud earrings


this is what you have to do


- cut fabric slightly bigger than the pot holder

- place the fabric rear facing up and the fabric facing the table


- place the pot holder onto the fabric, pull it up and pull the fabric tight against the back of pot holder


- cut a ribbon for the hanging


- staple it


- optional you can cover the slightly messy back of the pot holder with felt


- cut a piece of felt slightly smaller than the pot holder and fix it with hot glue


- use pearl stud earrings as pins to complete the chanel style

- enjoy


water hyazinth placemats


magnetic board


this is where got the inspiration from

http://www.hearthandmade.co.uk/2010/07/diy-memo-board-upcycled-pot-holders.html